QUOTE.fm Read WIP Demo #3

Today I want to show you the next update of our QUOTE.fm Read Demo, but first I want to say thank you for your feedback last time. Some things really got us thinking.

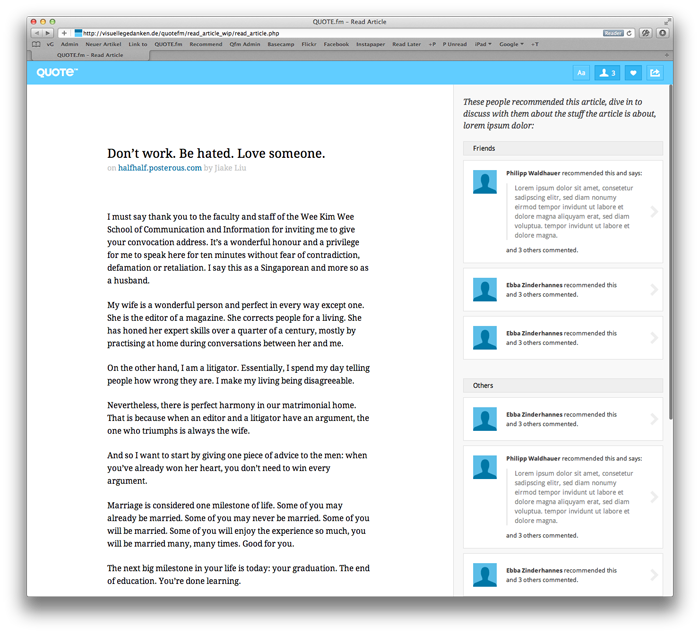
As planned you can now change the font-family as well as the color themes. All three themes are finished and we like them very much, although minor changes could always happen. The fonts are by no means final. I also replaced all the generic avatars with real ones to get a feel for how it might look in actual use. Furthermore I updated the text view with an image which resizes according to the text’s width. We changed the icon for the social reading mode to match the one the app will feature. A new feature is the „Reset“ button which sets everything back to the defaults. There are a few more little tweaks and changes here and there. Just have a look.

The list of todos is still very long and new ideas pop up everyday.
It really is very exciting build this ‚web app‘.
QUOTE.fm Read WIP Demo #2

Not to long ago I showed you the status of my work on QUOTE.fm Read. I also said I wanted to show you my progress along the way. So today I have a pretty nice update for you, I think. And yes, in the meantime I also did some other things.

So let’s get started with what’s new. The comments are finished and look mostly like the ones you already know from QUOTE.fm.
Furthermore I replaced the standard OS scrollbars in the social reading mode with JavaScript scrollbars. They look and behave almost exactly like the ones you might know from Mac OS X Lion. They looks nice and if you don’t need them they are simply out of your way.
Today I started working on the functioning of the customize buttons. You now can change the font size, line height and width of the text. Up next are the fonts and color themes.

Have a look, click a few buttons, resize the browser and so on and let me know what you think. However, I have to say that everything is work in progress and only tested in Safari and roughly Firefox.

Start QUOTE.fm Read Demo.

QUOTE.fm Read WIP Demo

As a designer Marcel often shares screenshots of the designs he is currently working on. I thought about what I can share with you guys that’s more than a screenshot of the pages in a browser, because if I do my job really good it looks exactly like the designs you already saw.

Our process at QUOTE.fm

After Marcel finished his work in Photoshop I take over the PSD files and begin working on the frontend. This means I craft all the HTML and CSS with dummy content and every possible state of every element. I also do all the animation stuff in JS and things like that. When I finished my work, it’s Philipp’s turn. He takes my stuff and integrates it in QUOTE.fm. He makes sure that everything works the way it should. From time to time he discovers minor bugs or needs some elements I forgot to implement. Then it’s my turn again. Sometimes we have to go back even further and do some design changes. We repeat this process over and over again until we are completely happy with the result.

What I am currently working on

The last couple of days I worked – with short interruptions – on the new Read section. As you might know we are building a read later service into QUOTE.fm. But that’s not all. We are also upgrading the read section with some social components.
For example you will see who recommended the story you are currently reading, what they said about it, which paragraph they marked, etc. You will also be able to comment on the article and engage in discussions right from the clean text view.

It’s all far from completion and everything could be changed any second, but I want to share my process along the way. So go ahead and try the QUOTE.fm Read WIP Demo.

Linktipp: Blende verstehen, eine interaktive Demo

blende_verstehen

Dieser Eintrag ist in erster Linie an die Anfänger in der Fotografie gedacht, aber man weiß ja nie, für wen es auch sonst noch gut ist.

Mir ging es jedenfalls anfangs so, dass ich ein Problem mit der Blende hatte, wenn ich davon gelesen habe. Einmal hieß es „große Blende“, dann mal wieder „offene Blende“, dann mal wieder „hohe Blendenzahl“. Dazu kam dann noch die Frage, was macht denn eigentlich welche Einstellung? Irgendwie hat mich das damals alles verwirrt. Irgendwann habe ich mich dann mal genau schlau gemacht und es mir notiert. Mittlerweile weiß ich es auch so ganz gut. :D

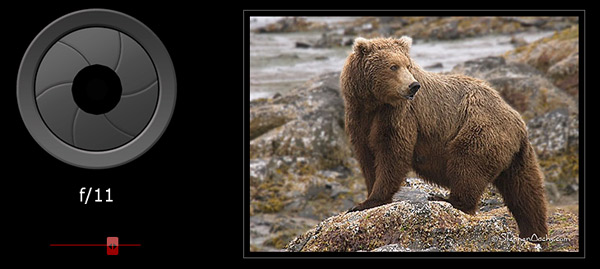
Ich bin jedenfalls auf eine kleine interaktive Demo plus einen Text zu diesem Thema gestoßen. Alle, denen die Bezeichnung der Blende und Ihre Funktion nicht klar ist, sollten sich diesen Artikel von Stephen W Oachs mal anschauen.

Falls die interaktive Demo nicht sofort funktioniert, den Regler einfach schieben und dann einen Moment warten. ;)