Weekly Recap

It’s sunday again already. Most of the past week I was on vacation and followed the web community only a little. Let’s see what we’ve got:

Weekly Recap

Happy Easter everyone! It was a slow week for me and thus it’s the shortest list since starting the Weekly Recap series, I apologise. Nevertheless, enjoy the links and don’t forget so spend some time with your family. Cheers!

  • CSSconf EU 2014
    After the huge success last year, the CSSconf EU is coming back this year. I hope to be there this year.

  • gulp – The vision, history, and future of the project
    Interesting background information on gulp.js.

  • Picturefill
    Picturefill Version 2 (Alpha) with native picture element support by Scott Jehl is here.

  • WordPress 3.9 “Smith”
    Version 3.9 of WordPress was released this week. It features easier image upload and editing and much more. I use it on this blog since it’s early alpha and recommend you update you blog, too.

  • Hassle Free Responsive Images for WordPress
    Interesting and well done solution but I’m hesitant to using it because if one would ever disable this plugin, all the shortcodes and therefore all images won’t work anymore.

  • IcoMoon
    If you work with icon fonts, this is THE web app for you. I use it all the time to create custom icon fonts.

Why I didn’t switch to Jekyll

Two weeks back the idea of using Jekyll, a static site generator, to power this blog came back into my head after reading this article by Paul Stamatiou. I had experimented with it somewhen last year and liked it so far but then just forgot about it.

I like the idea that I have everything under control, that there is no database and I just serve static files. Plain and simple. No extra markup coming from a CMS or plugin. So the idea of switching to Jekyll began to take shape.

I wasn’t quite sure if it would be a good idea, so this past week I got up early everyday and started writing a new theme for Jekyll, which, shouldn’t I like my new “CMS”, would be easy to port over to WordPress. In the end that’s what I did. And here is why.

The basics of Jekyll are pretty simple, so after I had a baseline of what I wanted I started to read about how I could migrate all of my posts and metadata from WordPress to Jekyll. There are tons of articles, GitHub Gists and whatnot. But I had trouble making it work. But after hours of struggling and trying dozens of different techniques and scripts I finally had what I wanted. Dozens of markdown files with all the content. 2671 files to be exact. (I used Exitwp and did some cleaning up manually.)

Build Performance

But here lies the first problem. Performance. Building the static site takes relatively long with that amount of posts. And you have to go through that with every change you make on your site or when you write a new post – or when you preview a new post. While developing I only ever generated a handful of posts to speed up the process, but nevertheless, I could see that building performance is or would be a problem in the future. Static site generators might probably be better for smaller sites and blogs which don’t write a lot of posts. But I plan on keeping this blog for the coming years or maybe my whole life, who knows.

This is a good cue, because I have no idea what I want to do with this blog in the future. Maybe it stays small with just one author and not a lot of other features besides articles. But I don’t know, it could also be possible that one day I want to grow it into some kind of magazine or something. And what then? WordPress is capable of pulling that of, Jekyll or any other static site generator is probably not.

Writing and publishing

In the end the only thing that really matters is, are you writing blog posts or not. And to be honest, WordPress makes it pretty damn easy for anyone. You have internet and a browser? Fine, you can blog. You can even use an app on your phone or tablet to publish articles. It’s not that easy with Jekyll. You need a command line, you whole git repository, ruby and whatnot. So another plus for staying with my beloved WordPress. And with some easy tweaks you can write Markdown in WordPress, too. I use Markdown Extra Plugin.

Site Performance

One thing that’s bugging me since I think a lot more about performance is that WordPress can get a little cluttered, code wise. It’s easy to install plugins which inject stylesheets and scripts on every page resulting in extra requests even if you don’t need them. But you can make WordPress really slim if you want to. You can remove code from wp_head and you can edit plugins or simply deactivate a bunch that you just don’t need.
And to further boost the performance, you can even serve static html files with tools like Cachify. Or automatically generate and deliver webp images with Optimus. Both awesome plugins written by my friend Sergej.

So in the end I stayed with WordPress. It’s extremely flexible, future-proof and fast if you treat it the right way. And although  I’m by all means no PHP expert, I know how to customise WordPress and I like to build sites with it.

New Blog Design

The new design is a tad simpler than the old one, but I might be putting comments back in and link an archive page and something like that. Also visual tweaks will always happen on the fly. But for now I like it as it is. Clean and simple. If you like to see the source code. It’s on GitHub. Enjoy!

If you have any further questions or feedback, feel free to tweet my at @_martinwolf or send me an e-mail.

Cheers,
Martin

WordPress 3.4 „Green“

A release that is especially cool for all the non-developer WordPress owners, who want to change some appearance things themselves. This means it’s good for theme developers, too.
You can find the new developer features in the WordPress Codex.

WordPress 3.4 Release Candidate 2

Andrew Nacin:

The second release candidate for WordPress 3.4 is now available. Since RC1, we’ve made a few dozen final changes.

The release of WordPress 3.4 is planned to be early next week. For all the developers Andrew put together some infos on the new things so you can make sure that your plugins and themes work correctly.

WordPress Blogging mit Blogsy für iPad

Der Name ist bescheuert und die App ist hässlich. Es ist trotzdem die beste Möglichkeit WordPress Blogeinträge vom iPad aus zu veröffentlichen. Man kann Artikelbilder vergeben und sogar Custom Fields anlegen. Die App unterstützt außerdem auch noch reichlich andere Dienste.

Wieso die offizielle WordPress App so hinterher hinkt verstehe ich nicht. Zum Kommentare beantworten ist sie top, danach hört’s aber auch schon auf. Sehr schade.

Pinterest „Pin It“ Button für Fotos in WordPress

Pinterest ist ja zur Zeit gerade stark im Kommen. Ich selbst bin da nicht aktiv, da ich keinen Nutzen für mich daraus ziehen kann, aber das hat ja nichts zu heißen. Ich habe mich also mal kurz hingesetzt und einen „Pin to Pinterest“ Button für alle Fotoeinträge hier eingebaut.

Ich dachte mir es könnte vielleicht für den ein oder anderen interessant sein, wie man den Pinterest Code für WordPress anpasst, deswegen habe ich das mal zusammen gefasst:

Auf der Goodies Seite von Pinterest findet ihr den ganz normalen Code für den Pin It Button. Ihr könnt da eine statische URL für die Seite, das Bild und eine Beschreibung eingeben, den Code kopieren und in eure Seite einfügen. Das für jeden Eintrag manuell zu machen ist natürlich undenkbar und deswegen nehmen wir uns den Code und pflanzen unsere dynamischen WordPress Inhalte ein. Achtung: Das funktioniert nur innerhalb des Loops.

Da ich jedem Eintrag, der ein Bild enthält auch ein Artikelbild zuweise, welches ich zum Beispiel auf Facebook anzeigen lasse, wenn ein Eintrag geteilt wird, nutze ich dieses einfach auch für Pinterest. Bietet sich ja an, wenn ich es eh schon einbinde. Das bedeutet also keine weitere Arbeit.

In den Ausgangscode, den man von Pinterest bekommt, habe ich an den betreffenden Stellen Platzhalter eingestezt, damit ich weiß, wo meine WordPress Codes eingefügt werden müssen:

<a href="http://pinterest.com/pin/create/button/?url=urlzurseite&media=urlzumbild&description=beschreibung" class="pin-it-button" count-layout="horizontal"><img border="0" src="//assets.pinterest.com/images/PinExt.png" title="Pin It" /></a>

Daraus machen wir dann folgendes:

<a href="http://pinterest.com/pin/create/button/?url=<?php the_permalink(); ?>&media=<?php echo wp_get_attachment_thumb_url( get_post_thumbnail_id( $post->ID ) ); ?>&description=<?php echo strip_tags(get_the_excerpt($post->ID)); ?>" class="pin-it-button" count-layout="horizontal"><img border="0" src="//assets.pinterest.com/images/PinExt.png" title="Pin It" /></a>

Statt urlzurseite setzen wir den Permalink Tag von WordPress ein, der dafür sorgt, dass immer die Adresse des Eintrags genutzt wird. An Stelle von urlzumbild binden wir den Code ein, der das Artikelbild des Eintrags abfragt und die url einfügt und zu guter letzt fügen wir statt beschreibung noch einen Code ein, der einen Ausschnitt des Eintrags abfragt und als Text ausgibt. Ich möchte hier nicht den kompletten Content abfragen, da das unter Umständen ein kompletter, langer Blogpost sein könnte. Man könnte aber auch einfach get_the_content statt get_the_excerpt nutzen.

Da ich Artikelbilder nur für meine Fotoposts einfüge, kann ich diesen Umstand ganz einfach nutzen um abzufragen ob der Pin It Button überhaupt angezeigt werden soll. Gibt es kein Artikelbild, soll auch kein Button angezeigt werden, weil er keine Funktion hätte. Das sieht dann so aus:

<?php if ( has_post_thumbnail() ) { ?>
    <a href="http://pinterest.com/pin/create/button/?url=<?php the_permalink(); ?>&media=<?php echo wp_get_attachment_thumb_url( get_post_thumbnail_id( $post->ID ) ); ?>&description=<?php echo strip_tags(get_the_excerpt($post->ID)); ?>" class="pin-it-button" count-layout="horizontal"><img border="0" src="//assets.pinterest.com/images/PinExt.png" title="Pin It" /></a>
<?php } ?>

Und dann am Ende nicht vergessen das Javascript vor dem schliessenden body-Tag einzufügen:

<script type="text/javascript" src="//assets.pinterest.com/js/pinit.js"></script>

Wenn ihr das Artikelbild schon für etwas anderes nutzt oder aus einem anderen Grund das Feld leer lassen wollt, könnt ihr auch speziell ein Bild per Custom Field für Pinterest definieren und dieses im obigen Code einfügen. Bedeutet allerdings bei jedem Eintrag Mehrarbeit.
Wenn daran Interesse besteht, sagt kurz Bescheid, dann erkläre ich das noch.

Und jetzt bin ich gespannt ob der Button auch benutzt wird. :D
WordPress Plugin: WP Photo Licenser

Christoph Boecken:

Was macht das Plugin? Beim Upload gibt es jetzt ein zusätzliches Dropdown-Feld und zwei Texteingaben, um die Art der Lizenz (alle Creative Commons sowie All Rights Reserved) einzugeben. Wenn ihr das Bild in den Beitrag einfügt wird der img-Tag mit sogenannten data-Parametern erweitert, die es seit HTML5 als eine Art Platzhalter für genau solche Daten gibt. Bei der Ausgabe im Blog wird das Foto dann in einen figure-Tag gepackt, per CSS die Lizenzinfo dann oben rechts über das Bild gelegt.

Christoph hat ein nettes, kleines Plugin für alle WordPress-Betreiber geschrieben, dass es ermöglicht Fotos leicht mit Lizenzen zu versehen und mit dem Original zu verlinken. Nette Sache für alle, die oft Fotos von anderen Fotografen einbinden.

WordPress App für webOS

Die WordPress App für webOS sieht wirklich gut aus. Notifications über neue Kommentare egal wo man gerade ist, finde ich ziemlich cool und überhaupt sieht es hübsch aus, auch wenn es natürlich ob der „Sliding Panels“ stark an Twitter fot iPad erinnert. Das bringt mich dann auch mal wieder zur Frage, wo bleibt eigentlich eine wirklich gute iPad und iPhone WordPress App?

Aus alt mach neu!

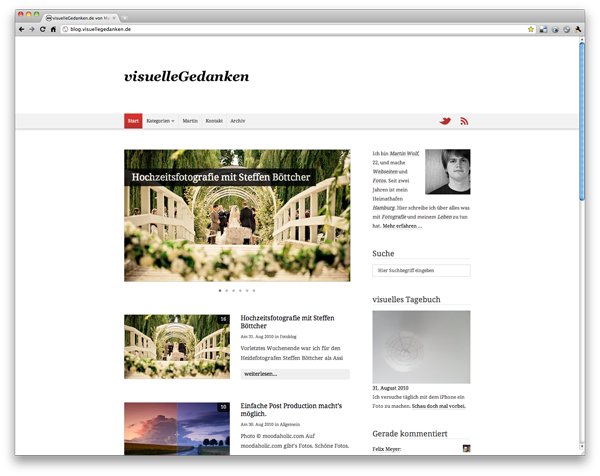
Oh, seht mal. Ein neues Design. Naja, so ganz neu ist es nicht. Ich habe das bis eben noch aktuelle Theme genommen und weiter entwickelt.

Das neue visuelleGedanken.de ist etwas luftiger geworden. Nicht im Platz, aber im allgemeinen Aussehen. Es gibt mehr Weißraum, weniger Farben, mehr Unterlinien. Außerdem jetzt eine Serifenschrift. Bei allen, die einen neuen, guten Browser nutzen, sieht sie auch genau so aus, wie sie es sollte. Ich mag es sehr. Etwas ganz neues wäre nicht das Richtige gewesen.
Bevor ihr euch an der ein oder anderen Stelle wundert, ich arbeite hier und da noch etwas weiter. Manches ließ sich nicht testen ohne live zu sein oder den Blog in den Wartungsmodus zu schalten, und das wollte ich schlichtweg vermeiden. Das Antworten auf einen Kommentar funktioniert zum Beispiel noch nicht genau so, wie ich es möchte.

Also ihr dürft und sollt aber trotzdem auch gerne Bugs oder Ähnliches posten.

Also dann. Kommt immer mal wieder aus eurem Feedreader raus und schaut vorbei. Hier und da wird noch etwas dazu kommen. Vielen Dank!